If you’re looking for a hands-on volume measurement activity for elementary students, this volume lesson using boxes is perfect for engaging your class in a meaningful way. Before your students begin any volume worksheets, give them a chance to explore volume using real containers and rulers. This activity is collaborative, active, and helps students understand volume in a tangible way.
Why Use Boxes to Teach Volume?
Your students need real-world math problems to understand what volume is. When they measure boxes, they get to actually manipulate them to know where to measure for length, width, and height. They are going to love this activity because it gets them out of their seats, and they get to work with other students.
What to Teach Before The Activity
Teach How to Use a Ruler with Fractions
Before you begin the activity, review how to measure with a ruler using quarters of an inch because measurements of boxes will not be exact whole numbers.
Understanding Decimal and Fraction Equivalents
Show your students a large image of a ruler (download it below) and teach them the decimal equivalent of ¼= .25, ½ = .5, ¾ = .75.

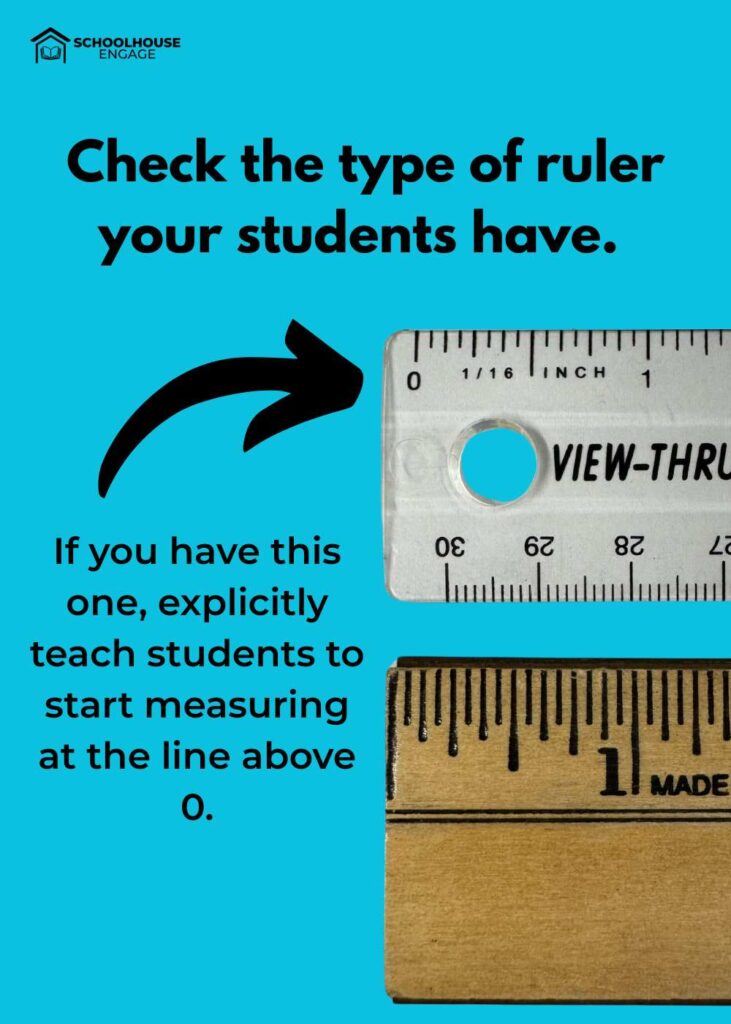
Where to Start Measuring
This might seem obvious to adults, but you need to explicitly teach students that you measure starting at zero or the first line, which may not always be at the edge of the ruler.
Round to the nearest quarter inch
What is a quarter of an inch? It is ¼, ½, or ¾. I don’t teach my students to measure to 16th of an inch because most word problems do not require it. If the box measures 16th of an inch, have your students round to the nearest quarter of an inch.
If some of your students are struggling with the measurements, you might want to just have them measure to the nearest half inch.
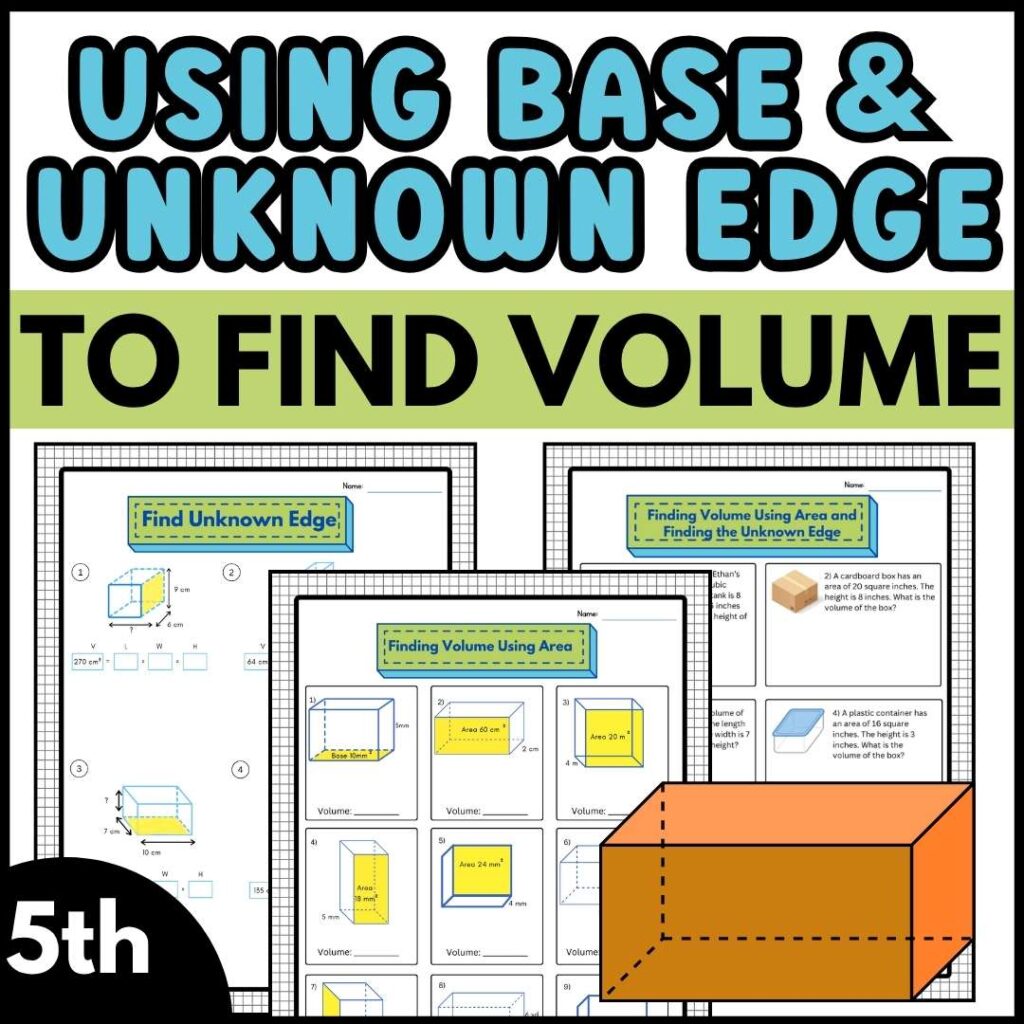
Base is Length times width (or the bottom part of an object)
Teach what base is, since many word problems will give the dimensions of the base without giving the dimensions of length and width. Worksheets will also have problems that will give the area of a side, which is also length x width, but many students won’t realize this and will need to be taught it explicitly.
If your students need practice with this skill of finding an unknown edge, click HERE.
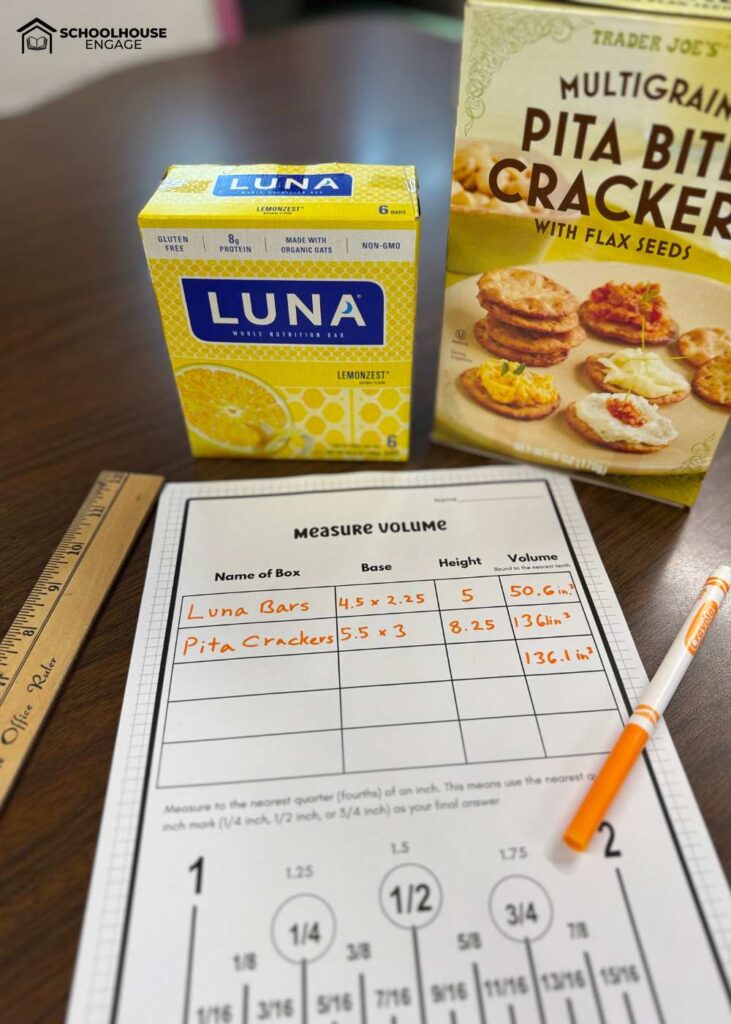
Materials for the Volume Box Activity
- Small boxes range in different sizes. If you can get multiple containers of the same box, that is even better. Start collecting now! Recording Sheet
- Ruler or measuring tape
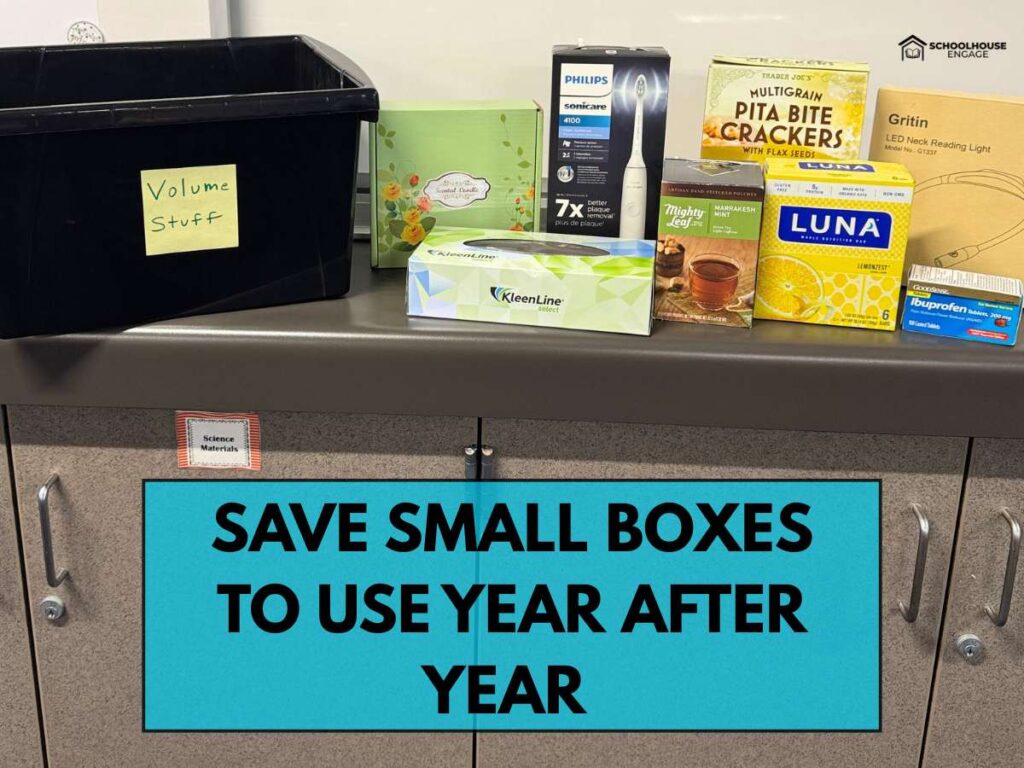
Pro Tip: Use boxes smaller than a shoe box and bigger than a box holding a container of aspirin. If you can, have double or triple of the same box; even better!
So start stocking up on those granola bar containers that you love so much!
Step-by-Step Instructions for the Volume Lesson
Explain Rules and Expectations
Before you hand out rulers, give instructions and explain your expectations, like no running and no smacking the rulers on the desk (why do they do that? Ughh!)
Explain that they are to visit each station and measure each box with a partner, and then move on to the next station. No lingering around to chat with friends.
Partner Measuring Activity
Let students work with partners. One partner should hold the container for their partner while the other measures. Working with partners makes the activity more interactive, and you will want them to work in pairs if you don’t have a lot of containers or boxes for them to measure.
IMAGE OF SIENA AND ALYSS MEASURING A BOX
Walk around and help your students who are struggling with measuring. Some of my students forgot that the base was length times width, so I walked around and reminded a few of them.
Recording and Reviewing Measurements
Remind students that before they start measuring a new box, they need to record their answers on the recording sheet. You can download that sheet below.
Wrap-Up: Review and Extend Learning
It’s too time-consuming to go over all the answers, so pick a few containers and get a consensus on the measurement. Most of your students won’t have accurate measurements, so let them know that these are an estimation of measurements since students had to round to the nearest quarter of an inch.
My students really enjoyed this activity. Next up is to have your students practice measuring volume with nets. Read more about how to do that in my blog post, “Engaging Ways to Teach Volume in 5th Grade with Nets.”
Once your students have completed both of these activities, they are ready to apply what they know about volume by creating nets and a 3D Volume Robot.
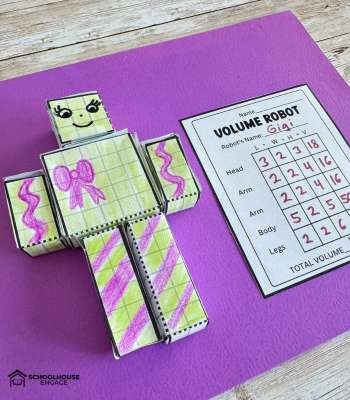
Read more in my blog post “Build a 3D Robot to Teach Volume: A Hands-On Math Activity for Elementary Students”.
I hope you use these activities like I do, year after year. You got this! Giselle