Making fractions relatable and understandable for students can be a real challenge. When teaching how to add and subtract unlike fractions, it’s easy to fall back on simply teaching students the algorithm because that’s how many of us learned.
But does it really help students understand what it means to add and subtract unlike fractions? After teaching 5th grade for ten + years, I’ve discovered a better way.
Introducing fractions with visual models, like the area model, builds a deeper understanding and lays the foundation for long-term success. Thank you, Common Core! Research even backs up this approach.
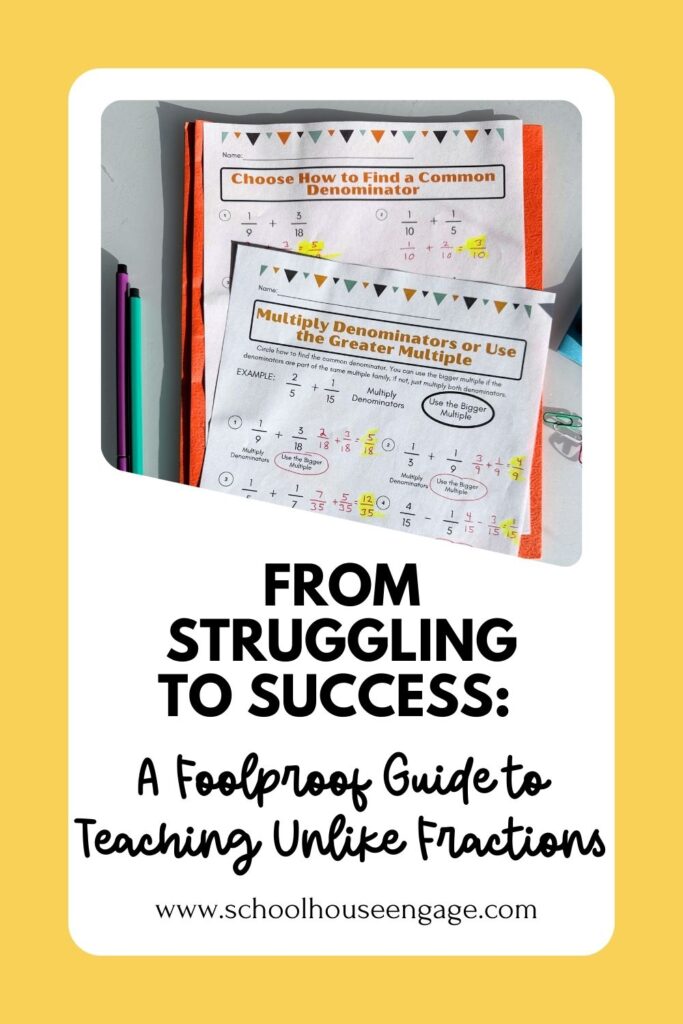
Why Use Visual Models When Teaching Adding and Subtracting Fractions?
Using visual models is essential for helping students grasp the concept of adding and subtracting fractions with unlike denominators. This approach aligns with Common Core Standard Numbers and Operations – Fractions (5.NF.2).
Visual models help students understand the meaning behind the steps they need to take rather than just memorizing them. The ultimate goal is for students to transition away from drawing pictures and use algorithms.
During the initial days of instruction, my students and I draw a lot of pictures so they can “see” how to make fractions have the same denominator. To make it fun, I encourage them to use different colored pencils. After all, who doesn’t enjoy a bit of coloring during math?
Mnemonic for Adding and Subtracting Unlike Fractions
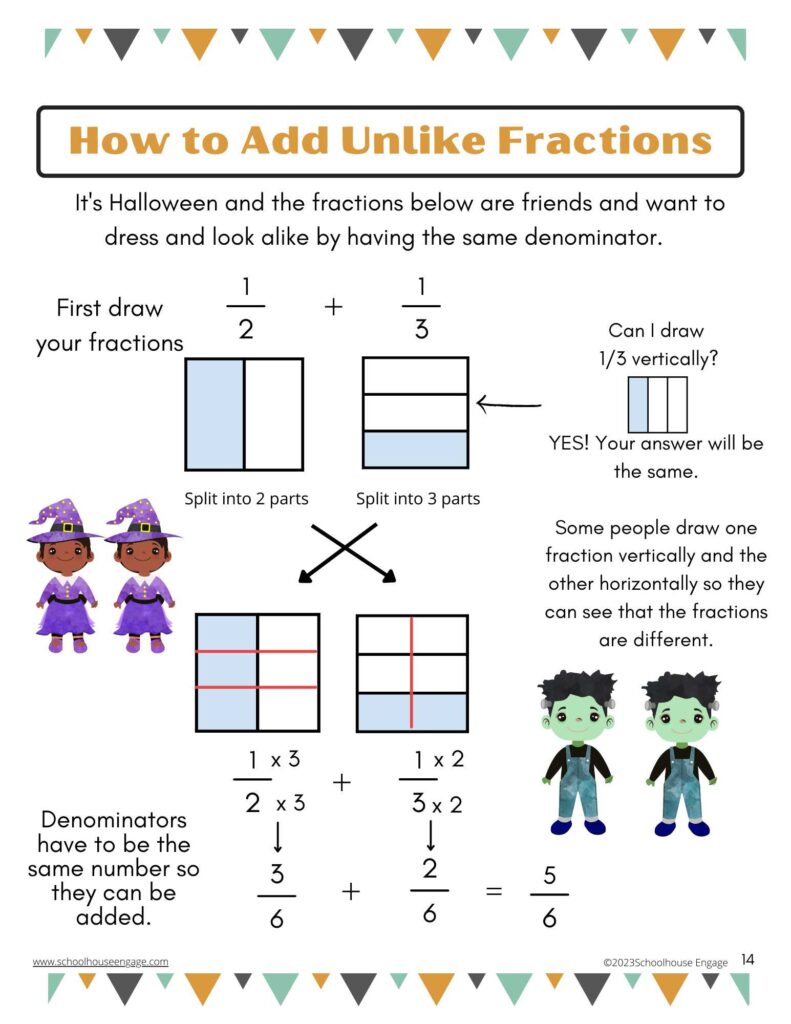
I teach a simple mnemonic to help students remember that the denominators need to be the same. I know it’s crazy but it works for students who are having a hard time remembering how to solve adding and subtracting unlike fractions.
I tell students that the fractions are friends and want to dress alike on Halloween by having the same denominator. Or you can say that it is Twin Day at school and the numbers want to look the same.
I use mnemonics in math and I wrote an article about other mnemonics I use to teach 5th grade math standards. I even use them in Social Studies. You can find a good one to help students memorize the names of the 13 colonies.
Multiplying the Denominators to Get a Common Denominator
Instead of immediately teaching students to multiply denominators, encourage them to discover patterns and shortcuts on their own. When solving problems, ask questions like: What pattern do you notice? Do you see a shortcut to solve these problems?
Seeing the “light bulb” moments when they identify the pattern of multiplying the denominators to get a common denominator is priceless!
Other Methods for Finding a Common Denominator
Once students master multiplying denominators to find a common denominator, I introduce other methods since multiplying denominators may result in a common denominator with a very high number that will have to be reduced.
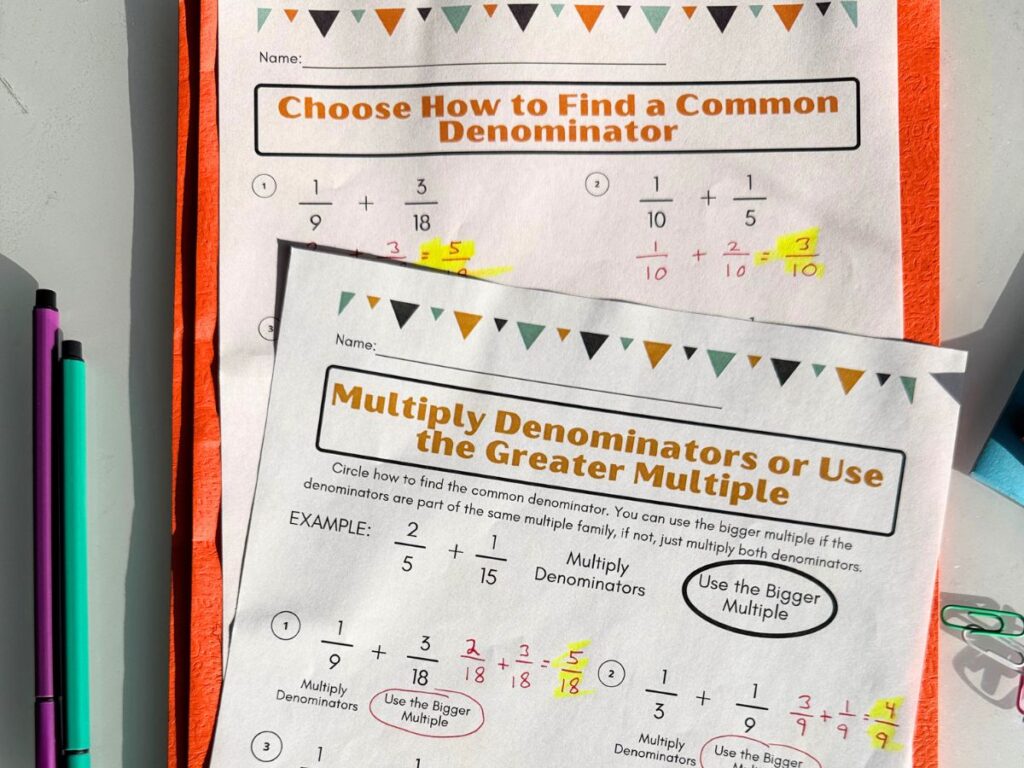
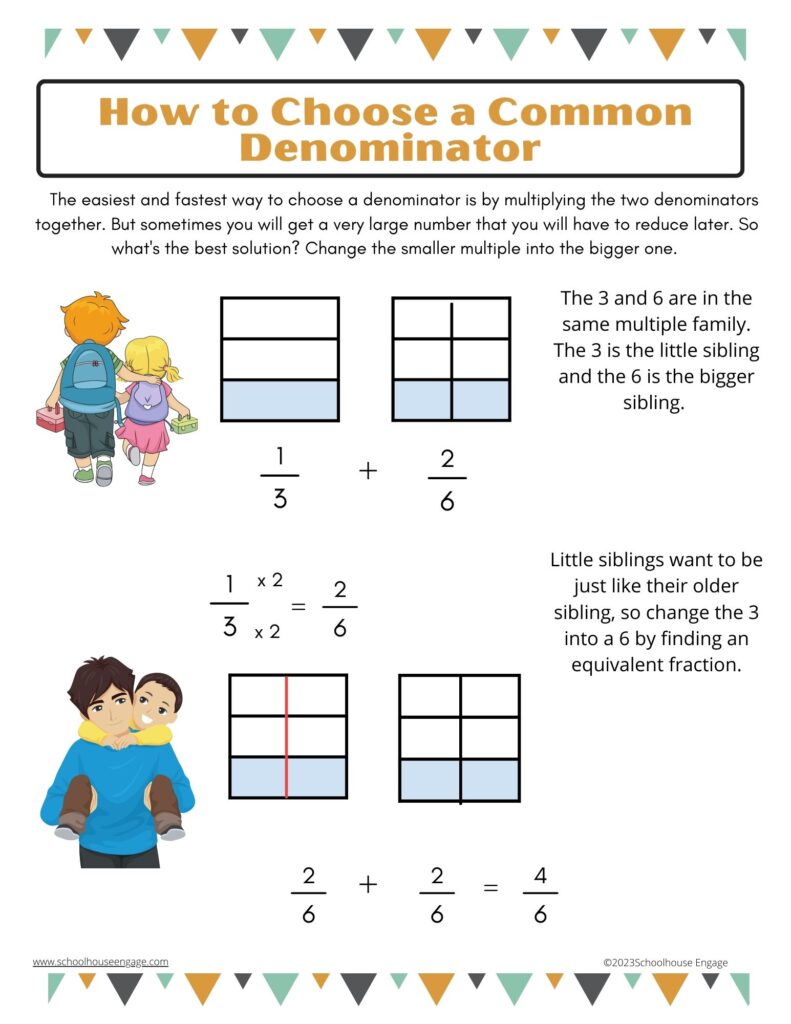
To avoid having to reduce or simply the answer, students can the larger multiple of the two denominators rather than multiplying them. For example, in the problem 1/3 + 1/9, we only need to change 1/3 into 3/9. Some students might multiply the denominators (3 and 9) to get 27, which works, but it requires an additional step to simplify the fraction.
Deciding how to find the common denominator should be taught explicitly. The worksheet below teaches this concept for true understanding!
Using the Larger Multiple to Find a Common Denominator
Students who struggle in math benefit from menonics. I teach my students how to use the larger multiple of the two numbers in the problem when adding and subtracting fractions by explaining that the denominators are like siblings: younger siblings always want to copy and be like their older siblings.
Ask the students to share experiences of perhaps their younger sibling wanting to play with the same toy they are playing with or eat the same thing they are. You will get a lot of responses and participation with this question.
Younger siblings who want to be like them are like smaller numbers wanting to be like the bigger number. To make the smaller denominator “copy” the larger one, we turn it into the same denominator.
Essentially with this mnemonic, I’m teaching students how to find the least common multiple, which leads me to the next question…
Should You Teach All Students to Use the Least Common Multiple?
Should you teach your students to find the least common multiple (LCM) when adding and subtracting unlike fractions? Not initially. Explain this until your students have had a lot of practice and encounter problems that require them to do so.
For my at-grade level or above students, I introduce this concept when they’re ready. For others, it’s not necessary early on. Teaching too many methods at once can overwhelm students, especially those who struggle with math.
Students who are far below grade level struggle with this and it’s better to teach them to either multiply the denominators or use the larger multiple AKA “big brother” or “big sister”.
Toward the end of the year, as we prepare for SBAC testing, I revisit the LCM method with my striving students (those working at a 3rd-4th grade math level). For these students, I focus on simple, clear steps to solve problems.
Subtracting Unlike Fractions with Visual Models
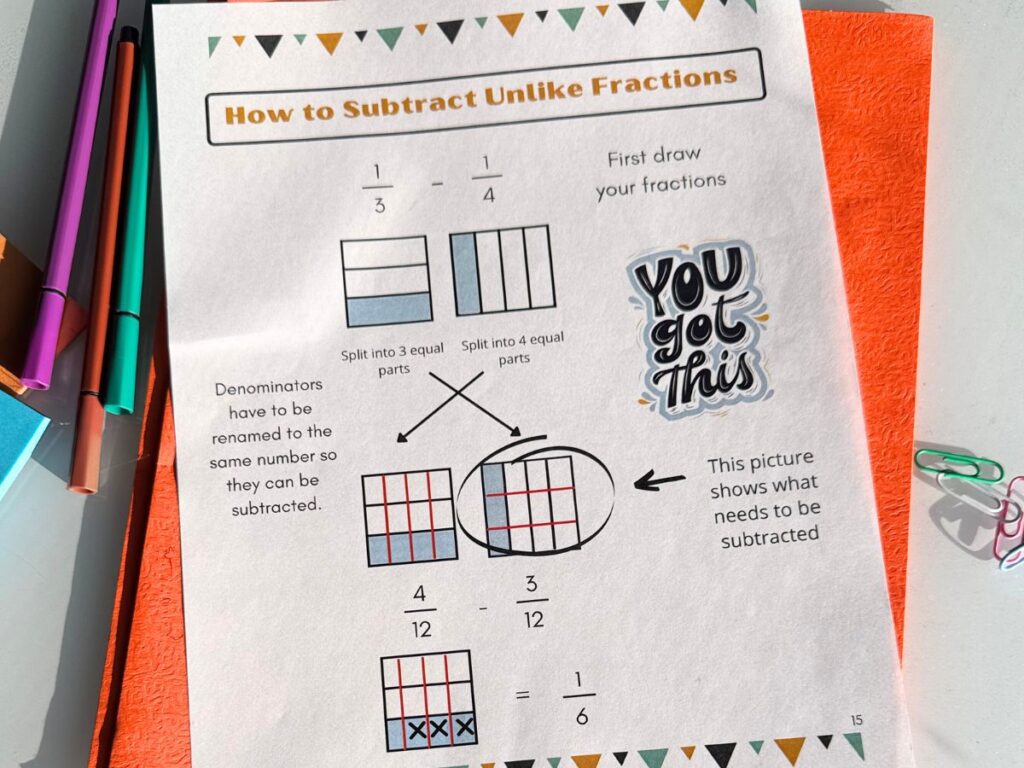
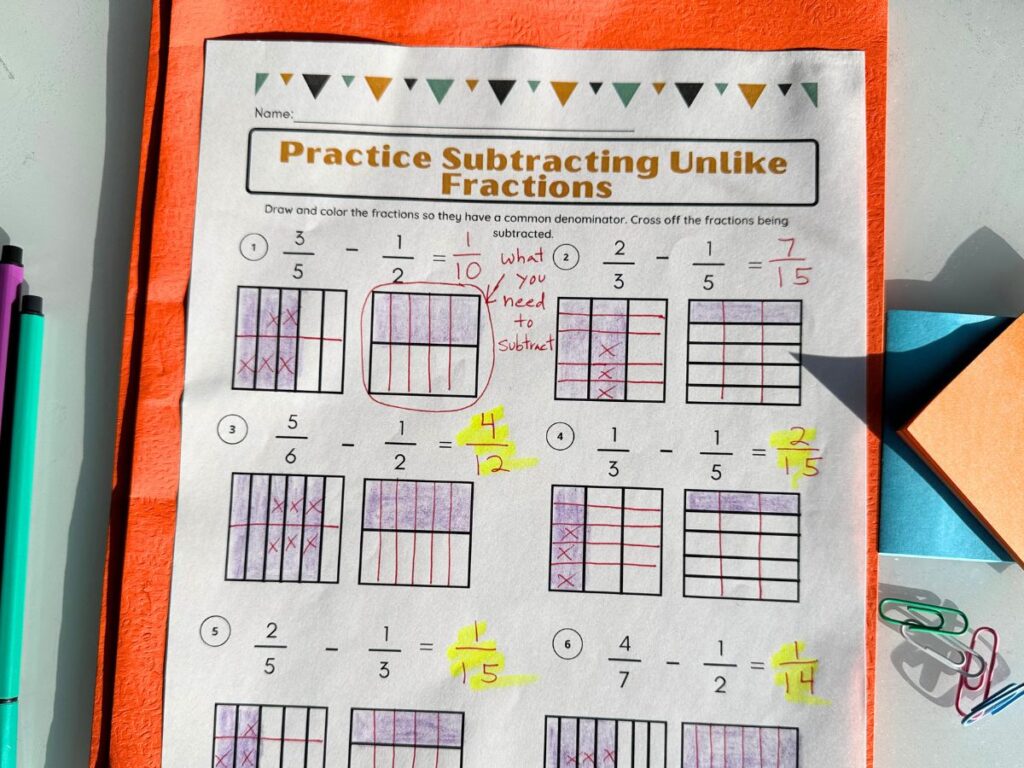
After students know how to add unlike fractions, it’s time to teach how to subtract them. When students are using visual models to subtract unlike fractions they must first create common denominators. It’s important to explicitly teach that the second fraction is an image of what they are subtracting.
I have students circle the second fraction and then cross off what they are “taking away.”
Final Thoughts on Teaching Adding and Subtracting Unlike Fractions
I hope this article has provided insight into the best ways to teach adding and subtracting fractions for true understanding. If you’re looking for resources to break down lessons in sequential order with visual models that make sense, check out my Teachers Pay Teachers store.
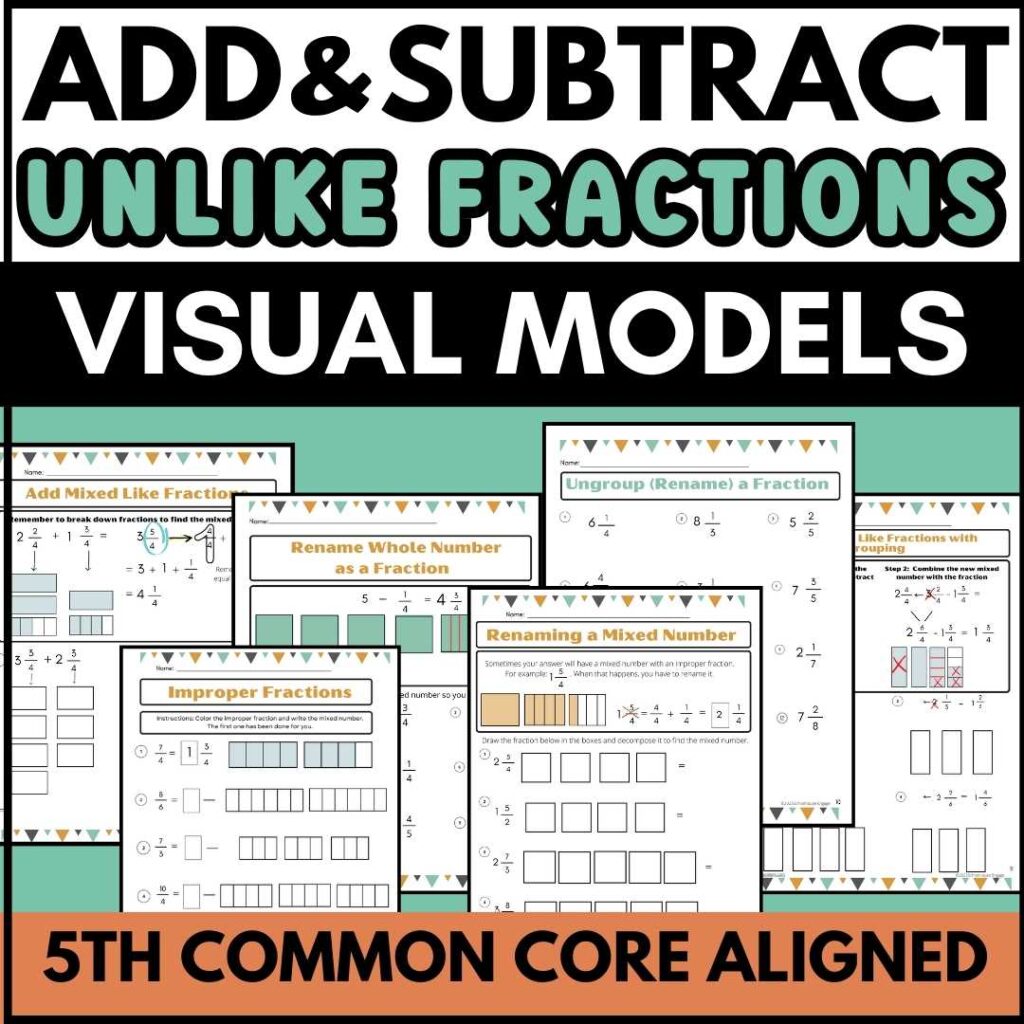
My worksheets include step-by-step lessons with visuals to simplify lesson planning. Teaching adding and subtracting unlike fractions doesn’t have to be hard if you know how to teach it in manageable steps—you’ve got this! Happy Teaching! – Giselle
