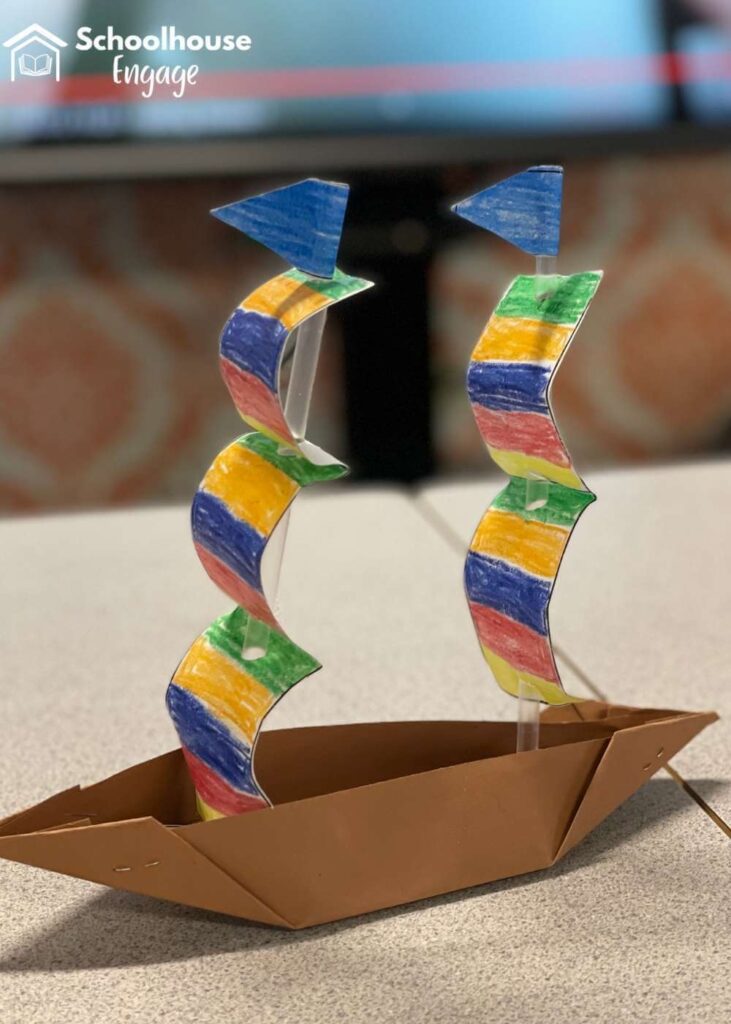
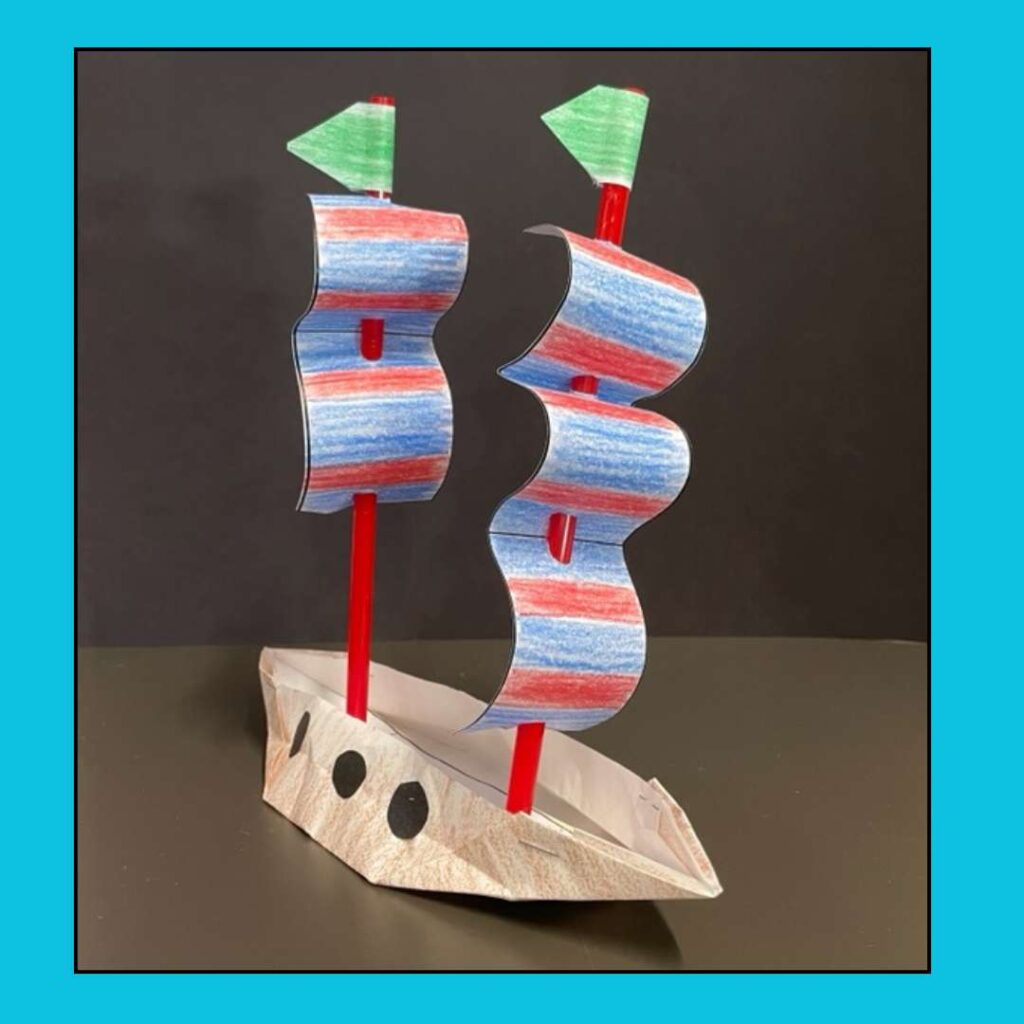
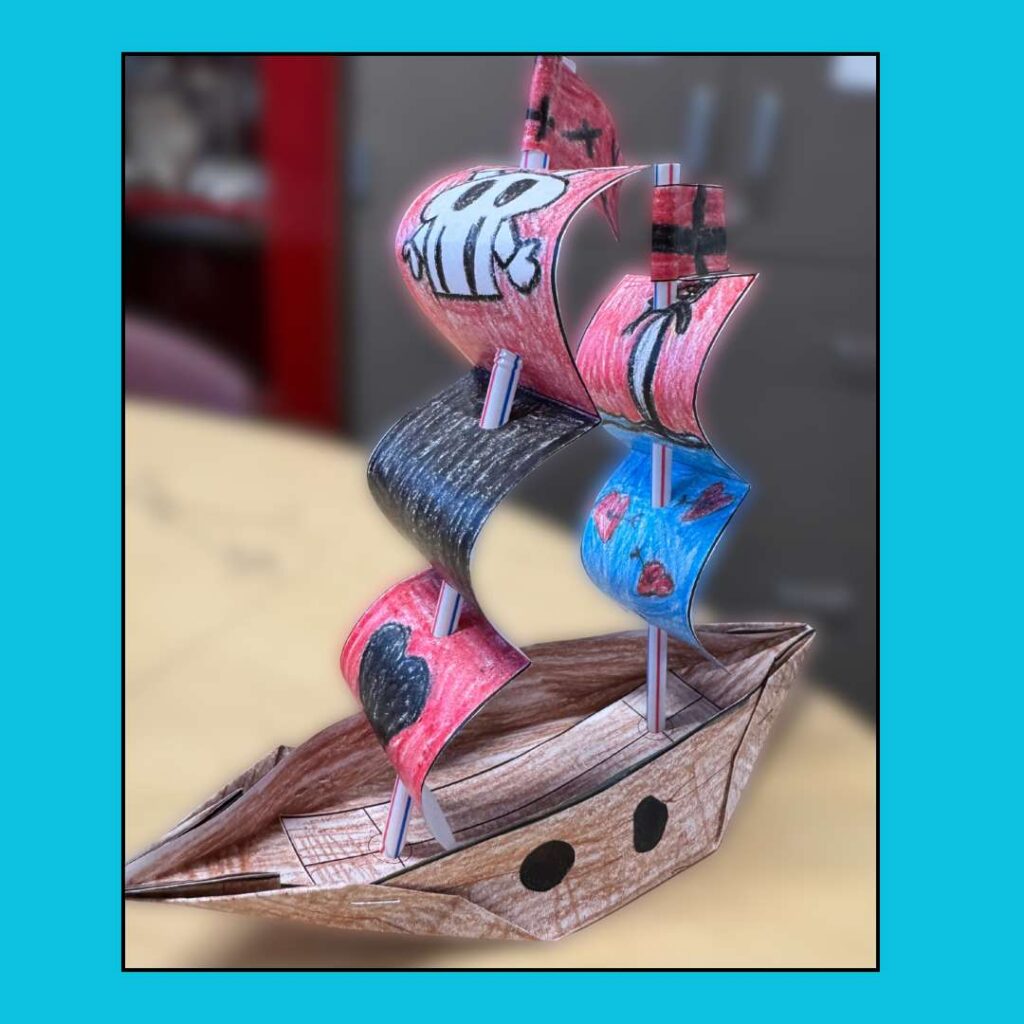
Looking for a fun and educational way to bring your European Explorers unit to life? This European Explorers Tall Ship Craft is the perfect hands-on project to help students visualize the famous ships that carried explorers across the ocean during the Age of Exploration.
With just a few simple materials, students can build their own tall ship and gain a deeper understanding of exploration, design, and teamwork.
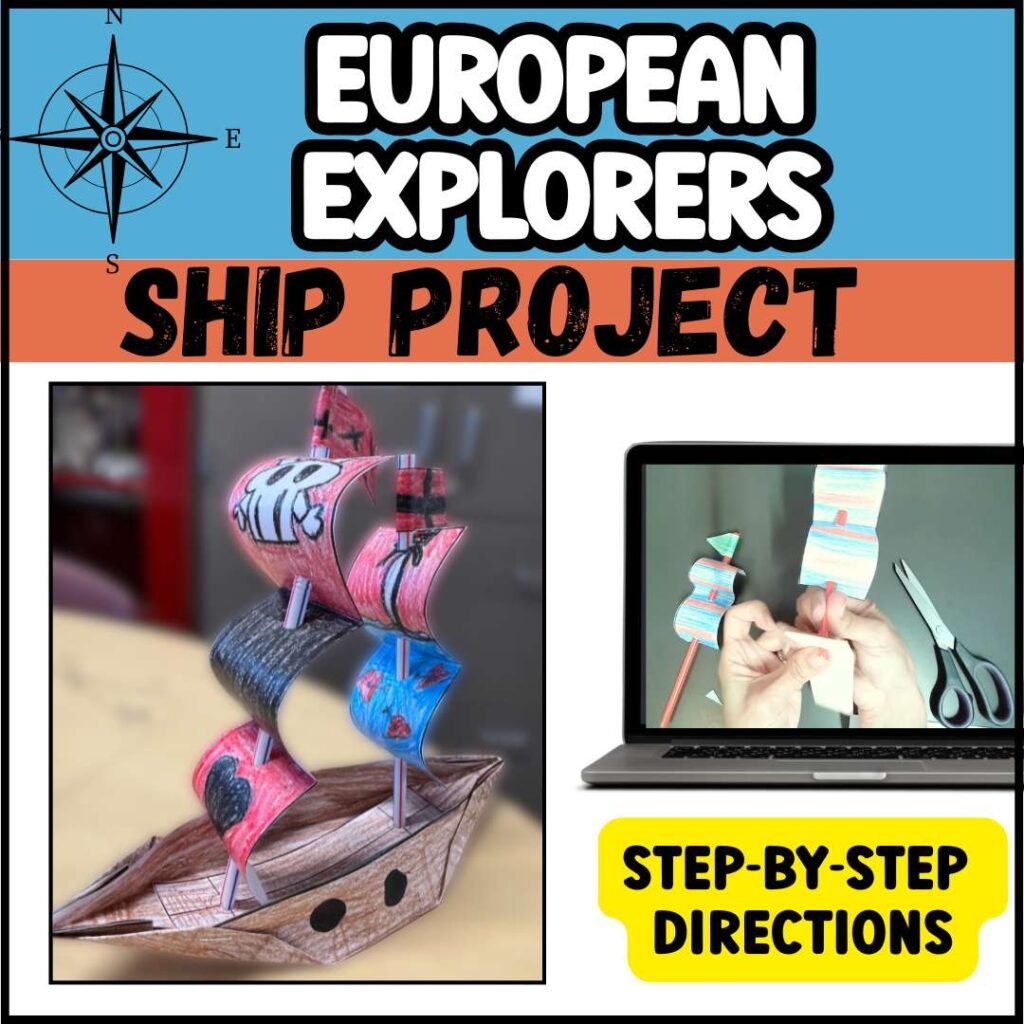
If you’d like to save time preparing materials, I also have a ready-to-use printable template with background slides and step-by-step directions available in my Teachers Pay Teachers store.
Why Make a Tall Ship Craft?
During the Age of Exploration, European explorers set sail on tall ships—strong, multi-masted vessels that could travel long distances across the ocean. Building a paper model helps students understand what it took to explore unknown worlds and discover new trade routes.
This activity combines art, history, and STEM skills while giving students a tangible connection to the explorers they’re studying.
Materials You’ll Need
You can make this project with everyday classroom materials:
- 1 sheet of copy paper or brown construction paper (6 x 9.5 inches) for the ship base
- 2 white paper strips for sails (6 x 1.5 inches)
- 2 small flag pieces (6 x 1.5 inches)
- 2 straws
- Scissors
- Tape or glue
- Stapler
- Hole punch
- Optional: crayons, colored pencils, or markers
Teacher Tip: Want to skip all the measuring and cutting? Grab my print-and-go European Explorers Tall Ship Template from Teachers Pay Teachers. It includes perfectly sized pieces that students can cut themselves, visuals, and slides that explain how tall ships changed exploration forever.
Step 1: Prepare and Color Your Paper
Have students color their 6 x 9.5-inch paper brown to look like wood—or use brown construction paper for a sturdier ship base.
Encourage them to decorate their sails before cutting them out with stripes, flags, or explorer symbols. This adds a creative touch and makes each tall ship unique!
Step 2: Fold the Ship Base
- Place the paper horizontally (landscape).
- Fold the bottom edge up about one inch.
- Flip the paper over and fold the opposite edge up the same way.
- Repeat folding one more time on each side to create a sturdy edge.
- Open the ends slightly and staple the folded flaps together at each corner to form the front and back of the ship.
Now you’ll have a solid base that looks like the hull of a tall ship.
Step 3: Create and Punch Holes in the Sails
Take your 6 x 1.5-inch sail strips and fold each one in half.
Punch one hole near the top and one near the bottom of the folded edge.
Repeat for both sails. These holes will be where your straws (masts) go through.
Step 4: Assemble the Masts and Flags
Slide each straw through the holes in your sails—first through the front hole, then through the back.
If the fit is tight, twist the straw gently as you push it through.
Glue or tape a flag at the top of each straw and trim the edges into triangles for a classic tall ship look.
Step 5: Attach the Masts to the Ship
Cut 4–5 small slits at the bottom of each straw. This helps anchor your mast into the ship base.
Insert each straw into the ship and tape it underneath so it stands upright.
You can use glue or extra tape to make the structure sturdy.
Step 6: Finishing Touches
Once your masts are attached, let everything dry and admire your students’ creations!
Display the finished tall ships around your classroom as part of your European Explorers bulletin board. Students can label their ships with explorer names, routes, or country flags.
Save Time with the Printable Template
If you’d like to make this lesson even easier, check out my European Explorers Tall Ship Craft Template on Teachers Pay Teachers.
It includes:
✅ Step-by-step printable directions
✅ Pre-sized templates for the ship, sails, and flags
✅ Background slides about tall ships and European exploration
✅ A YouTube video tutorial to guide your class
This resource is perfect for teachers looking for a low-prep, hands-on social studies project that integrates art, history, and creativity.
Extend the Lesson
Once your students finish building their tall ships, try one of these extension ideas:
- Writing Prompt: “If you were an explorer setting sail on this tall ship, where would you go and why?”
- Labeling Activity: Identify parts of the ship (mast, sail, hull, stern).
- STEM Challenge: Find another origami folding pattern to make a boat. Cover the boats in aluminum foil and test which design can hold the most weight without sinking.
Bringing history to life doesn’t have to be complicated. This tall ship craft gives students a meaningful, hands-on way to connect with European explorers while strengthening creativity, collaboration, and content understanding.
Whether you use classroom materials or the ready-made printable template, this project is an engaging way to deepen learning and make your Age of Exploration unit memorable. Your students won’t just learn about tall ships—they’ll experience what exploration was like in a tangible, lasting way.
Be sure to check out my other European Explorer blog posts:
8 Fun Activities to Teach European Exploration
How to Make an Astrolabe Craft: European Explorers Activity for Upper Elementary